
Want to have a Git repository integrated into your project and keep all work up-to-date? Then do not miss our new post! .
Before we plunge into practice, make sure you understand the notion of repositories in general. If there are any doubts, you can check our previous article. It is essential to grasp the idea why we actually need repositories. Thanks to their configuring, users are able to get integrated version control as if the subversion repository was being hosted locally, as well as to see commits stats for team members, and track time right from a commit message.
Let’s take RedmineUP as a possible vendor to give you an insight on how to connect your Redmine with GitHub. To do this, create a RedmineUP account. Registration takes only a minute. While signing up, fill out your name, email and a phone number to select an account subdomain. The link to your profile will be sent just right after you have logged in. To create a free RedmineUP Cloud account, click here.
But first off, you need to share your external repository URL so that the provider is able to mirror it. The project management software will generate a pair of SSH keys which you can add as a deploy key. Thus, the tool will have read-only access to your private Git, not the one that may modify your data.
Well, when all is settled, let’s start the magic!
Migrate to secure hosting
Don't waste your time on Redmine maintenance. Hire experts and focus on your projects
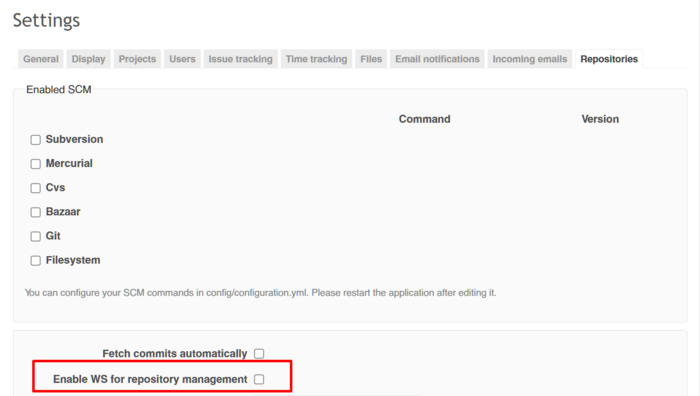
Step 1. Enable WS for Repository Management
Go to Administration Settings and choose the tab Repositories. We should be sure that the option Enable WS for repository management is active with an API key set up. Otherwise, generate a key yourself by clicking the same-name button.
RedmineUP Solutions
Extend your Redmine functionality with our solutions and services
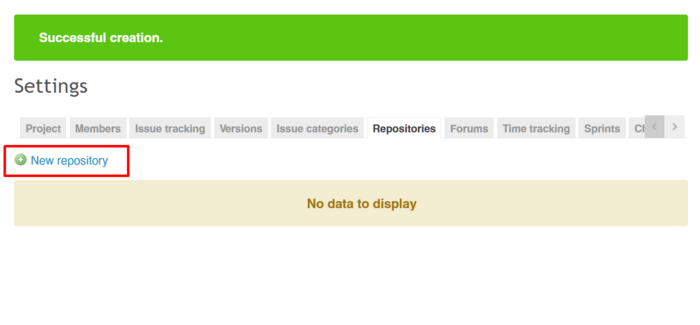
Step 2. Create a Project and Configure Settings
Once you have created a project, go back to Administration Settings and choose the New repository button.
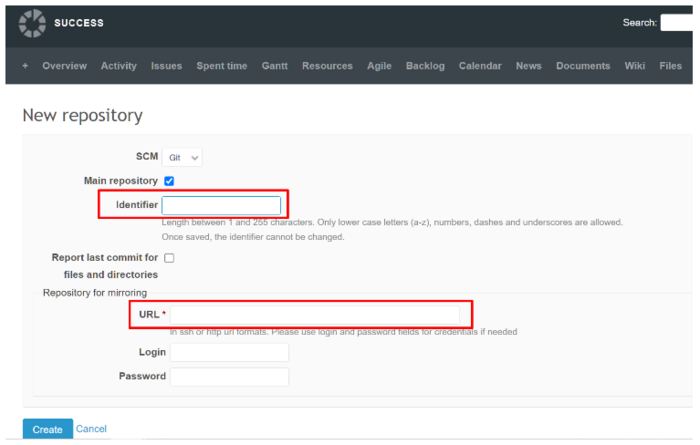
Select an Identifier, enter the URL of your GitHub repository (SSH for private repositories, SSH or HTTP for public ones) in the field called Repository for mirroring, and click on the button Create.
Then, inside your project, navigate to the Repository tab and select the repository you have just created. What you should see is the instructions on the right sidebar with Payload URL.
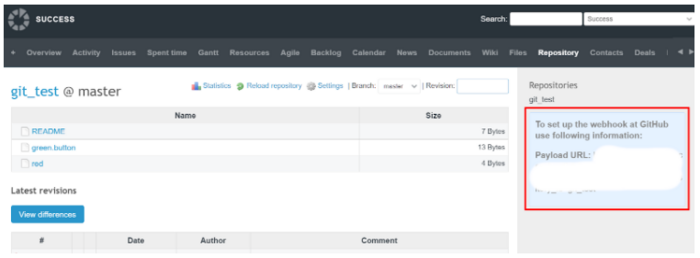
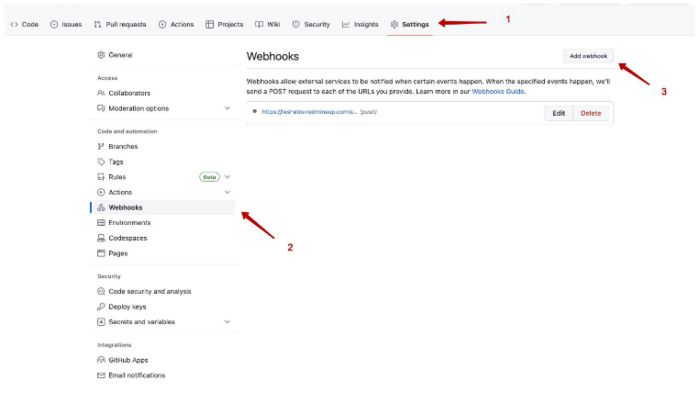
Step 3. Set Up Git Connection
Open your GitHub and go to your repository. Now it is time to configure its settings: navigate to Webhooks and click on the button Add Webhook. Complete the information from the RedmineUP’s Payload URL. And you are done! The repository should be visualized on your Cloud account shortly afterwards. What is more, the GitHub connection will enable you to link Git commits issues and correlate the code with bugs and new features.
By integrating your projects with GitHub, delivering the project’s updates gets significantly faster. It is not just an empty phrase; our clients’ experience has proved the obvious benefits gifted by Git integration.
Peter Gaarde from RSP Systems made it pretty clear:
The integration of GitHub with RedmineUP makes it possible to track changes to documents (typically source code) stored in GitHub - back to the original risk element, design input, bug report, regulatory requirement or other impacts that initiated that change. The impact is made into an issue and can be broken down into sub-issues containing, e.g. software-requirements. The requirement-issues will follow some software development lifecycle supported by workflow, statuses, tackers, checklists, and working instructions in RedmineUP.
RedmineUP Solutions
Extend your Redmine functionality with our solutions and services