
So, you’ve heard about Redmine. You’ve heard it’s a powerful, flexible, and open-source project management tool, and you’re ready to see what it can do for your team. But where do you even begin?
.
Before introducing Redmine to the team and management, it's essential to become familiar with it yourself. While you may already have experience using Redmine to track issues and centralize information, to truly see the big picture and maintain focus on project goals, you must configure it to meet your team's specific needs.
Previously, we explored the best way to try a demo of Redmine. Now, it's time to get started with Redmine for your own team.
This guide will walk you through the first essential steps to configure your Redmine instance and set your first project up for success.
1. Redmine installation and first login
The fact that Redmine is open-source can be misleading. Its major requirement is a significant investment in infrastructure and technical expertise. Since it's self-hosted, you must provision a dedicated server or virtual private server (VPS) and have an in-house or contracted developer skilled in Ruby on Rails and DevOps to handle the complex installation and ongoing maintenance, which adds to the total cost of ownership.
Deploying Redmine for an enterprise requires choosing between two main paths.
Hosted Redmine: The easiest way to get started is with a Redmine hosting. It’s a fully managed, pre-configured Redmine hosting solution.
RedmineUP Cloud offers a ready-to-use, stable version of Redmine, along with popular plugins. Instead of investing around $7000 in server infrastructure and hiring Redmine experts, you can create a free cloud account to get started.
Self-hosted Redmine:
If you choose the self-hosted route, begin by provisioning a robust server with ample CPU and RAM, running a stable Linux operating system like Ubuntu. The most efficient installation method is via Docker containers. By using Docker Compose to define your Redmine application and its PostgreSQL database in a single configuration file, you can launch the entire stack with one command, avoiding the complexity of a manual setup.
Once installed, critical enterprise configuration is essential. Immediately integrate Redmine with your corporate LDAP or Active Directory to streamline user authentication and enhance security. Furthermore, you must configure SMTP settings for email notifications and install an SSL certificate to encrypt all web traffic. Finally, establishing a rigorous, automated backup routine for both your application files and your database is non-negotiable for ensuring data safety and business continuity.
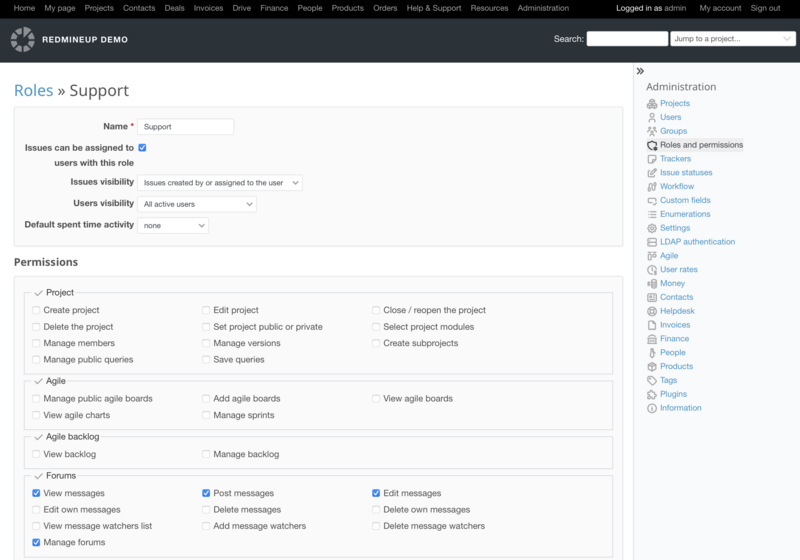
2. Essential Redmine configuration
Once you have successfully installed Redmine, a series of essential configuration steps are required to make it secure, functional, and tailored to your organization's needs. This process should begin within the administration menu, which is your central hub for managing the system.
To maintain system security and integrity, the ability to configure Redmine is exclusively granted to users with the Administrator role. This responsibility is typically assigned to a senior technical leader, such as a CTO, or a designated systems administrator.
First, you must configure the core system settings. Navigate to Administration -> Settings and define your application name, default language, and the email address that will be used for sending automated notifications. Crucially, you must correctly set up the outgoing email (SMTP) server settings; without this, users will not receive notifications about issue updates or password resets.
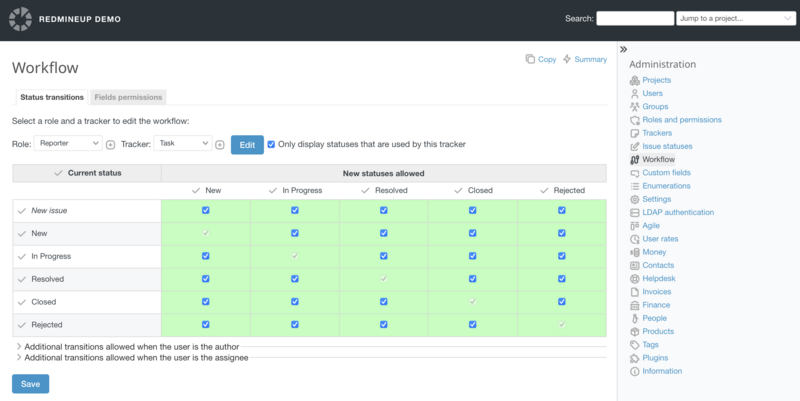
Next, establish your project structure. Before creating users, it is advisable to set up at least one Tracker (e.g., Bug, Feature, Support) and customize your Issue Statuses and Workflows. This defines the lifecycle of your tasks. Then, create your first project from the Projects tab. Within the project settings, you can enable specific modules like the issue tracker, wiki, documents, and calendars based on the project's requirements.
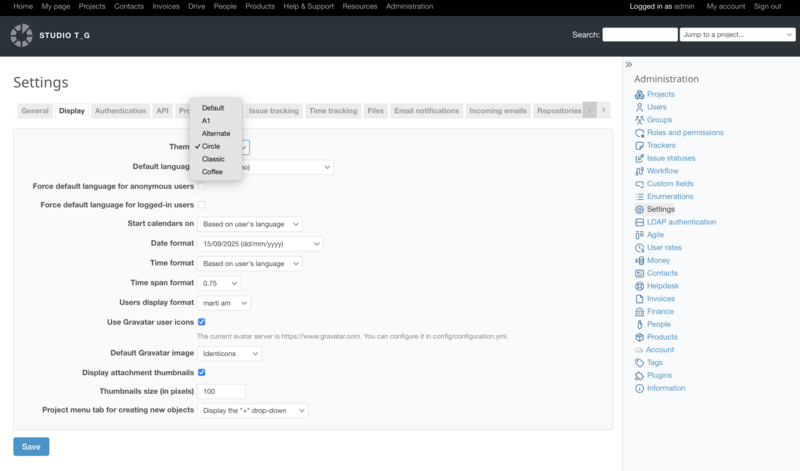
3. Choose Redmine theme
A Redmine theme is an option to customise and enhance the way you interact with Redmine on a daily basis. Whether you're a developer, project manager, or CTO, keeping up with the latest themes can change the way you interact with Redmine.
The Redmine Circle theme offers a modern and clean interface for your Redmine project management platform. Known for its intuitive design and user-friendly experience, Circle provides a visually appealing and efficient way to navigate and manage your projects. Fully compatible with Redmine 6, this free theme is a popular choice, and in fact, it's the most popular theme among RedmineUP customers.
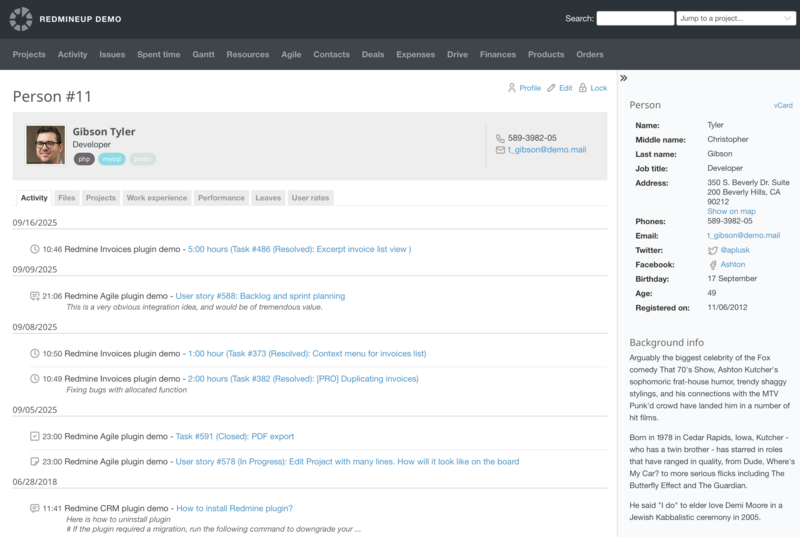
4. Set up your team and permissions
Now, add your team members as users. This typically involves entering their name and email address. They will usually receive an email to set their own password.
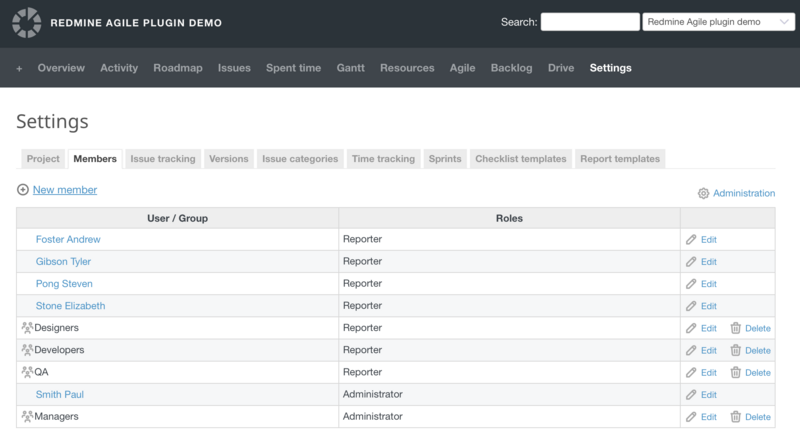
Assign Members to Projects with Roles. For each project:
- 1. Navigate to the project's Settings or Members tab.
- 2. Click "New member" or "Add member".
- 3. Select a User and assign them a Role (or multiple roles!).
- 4. Repeat for every team member on that project.
A user can have different roles in different projects. Jane can be a "Manager" on Project A and a "Developer" on Project B.
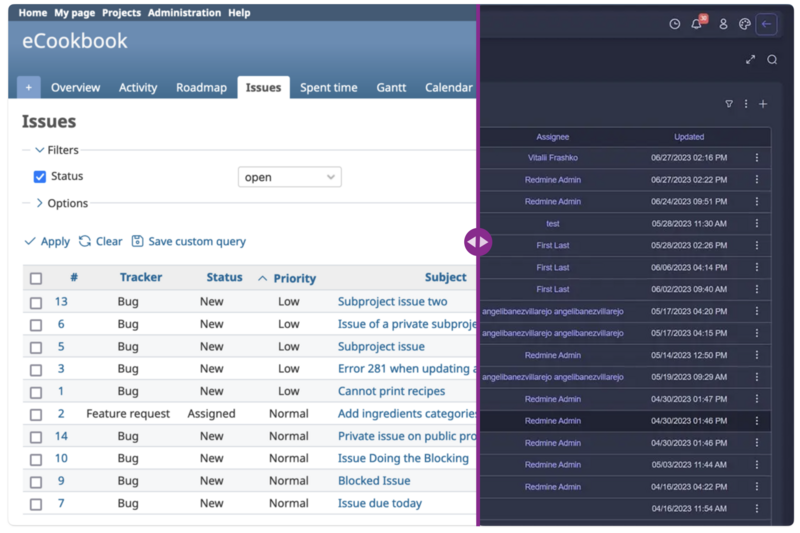
5. Create your first issue
Whether you’re launching a new product, planning a marketing campaign, or tracking software bugs, knowing how to quickly spin up a project and populate it with tasks is your first step toward organized success.
Think of a project as a container for all the work, discussions, and files related to a specific goal.
Find the "New Project" Button. This is usually prominently displayed on your dashboard or in a main navigation menu. It might be called "Create Project," "New," or represented by a big plus (+) icon. Fill in the Essential Details.

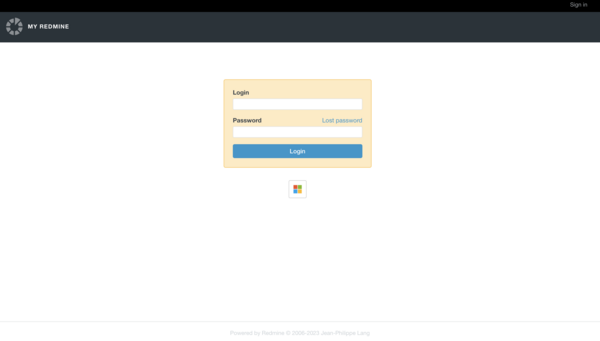
6. User access and identity management
Security starts with who has access to your Redmine data. A good hosting provider will offer features for strong user access and identity management. This includes support for Single Sign-On (SSO), which simplifies access while maintaining control, and Multi-Factor Authentication (MFA), which adds an extra layer of security beyond just a password. These features prevent unauthorized access, even if a user's password is stolen.
We're currently running Redmine on our server. We're interested in migration to your web-hosted RedmineUP solution to benefit from reduced maintenance and dedicated technical support. Additionally, we utilize Single Sign-On (SSO) with Azure Active Directory (Azure AD) for automated user authentication. Etienne Brault, IT Supervisor
This guide will walk you through the steps to set up SSO with Azure AD and integrate it with Redmine. Once the configuration is complete, users will be able to use SSO to log into their Redmine accounts. By following these steps, you can easily set up SSO with Azure AD and integrate it with RedmineUP cloud account. This will provide secure access to Redmine accounts and make it easier for users to log in.
7. View your progress
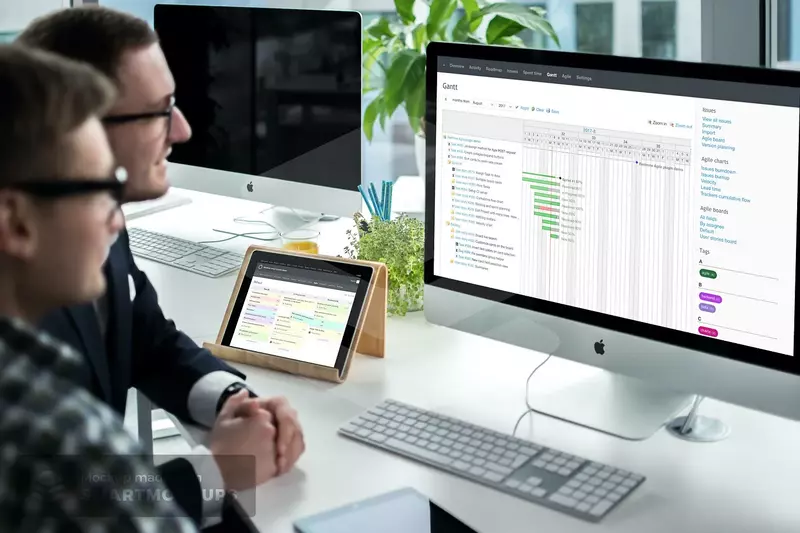
Gantt charts are designed to identify milestones, dependencies, stages and highlight major issues when planning long-term projects. You may easily illustrate task dependencies. For example, by showing on a chart how the beginning of one task can depend on the ending of another. This information allows managers to plan work and allocate resources in a way that does not interfere with project progress.
Redmine provides powerful tools to visualize your project's health:
- The Gantt chart: View your issues and their dependencies on a timeline. It’s perfect for understanding your project’s schedule at a glance.
- The Calendar: See all issues with due dates in a familiar calendar view.
- Overview page: Your project’s homepage shows recent activity, upcoming deadlines, and a summary of progress.
8. Taking Redmine to the next level with RedmineUP
Redmine boasts a vast and mature community, with over a decade of active development. This has resulted in a rich ecosystem of plugins and themes designed to extend its core functionality. You can implement Agile project management boards, automate helpdesk workflows, and much more. Let's explore some of the most popular integrations for beginners.
Git repository integration for software development teams.
Integrating your Git repositories with Redmine creates a powerful, unified workflow that significantly enhances transparency, traceability, and efficiency for software development teams. It moves beyond simply tracking tasks to creating a live, interconnected record of the entire development process.
Peter Gaarde, Head of
Software Development The integration of GitHub with RedmineUP makes it possible to track changes to documents (typically source code) stored in GitHub - back to the original risk element, design input, bug report, regulatory requirement or other impacts that initiated that change.
SSO Azure integration
Setting up Single Sign-On (SSO) with Azure Active Directory (Azure AD) is a great way to ensure secure access to Redmine accounts. With SSO, users can access their Redmine accounts without having to re-enter their credentials each time they log in.
Setting Up a Kanban board in Redmine
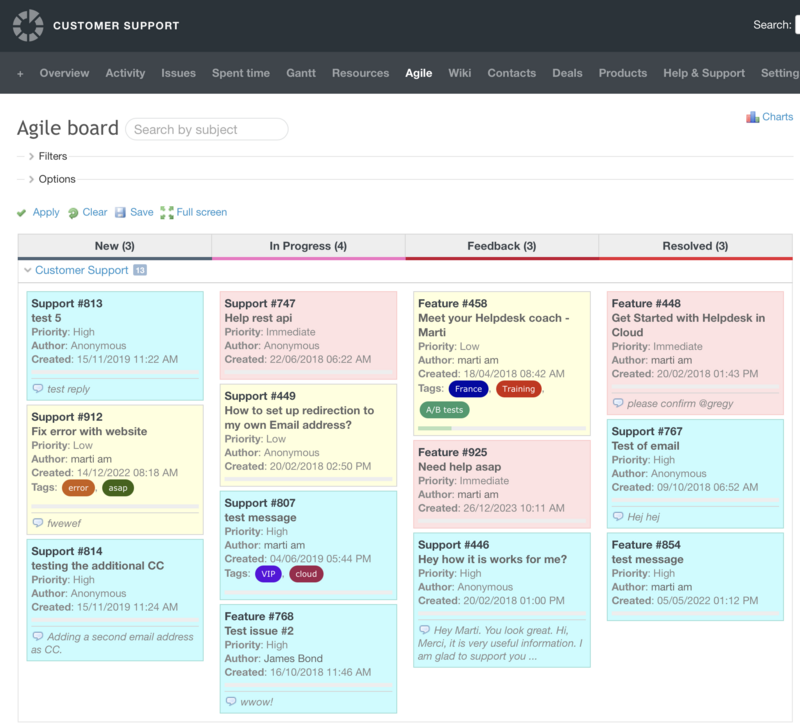
A table list is the most basic method of organizing and tracking tickets in a helpdesk environment. It essentially involves creating a spreadsheet or database table with columns for various ticket attributes. This approach has been the standard for many years due to its simplicity and adaptability.
One of the main advantages of kanban is that you can physically watch the work "progress" through the stages. The task card starts on the left side of your Kanban board and gradually works its way up to the "Resolved" column as it is completed. This practice not only gives you an overview of the work progression through the stages but also displays its current status in real time.
Dimitar Chervenakov , Head of
Customer Care at RedmineUP At RedmineUP, we use colour for the cards to highlight the highest priority tasks. When passed to the second (technical) level, developers understand the priority and select the right tasks. On the other hand, each of us can configure our own board and thanks to swimlanes, set up a necessary parameter and save a few different boards right on the sidebar of Redmine.
Helpdesk integration
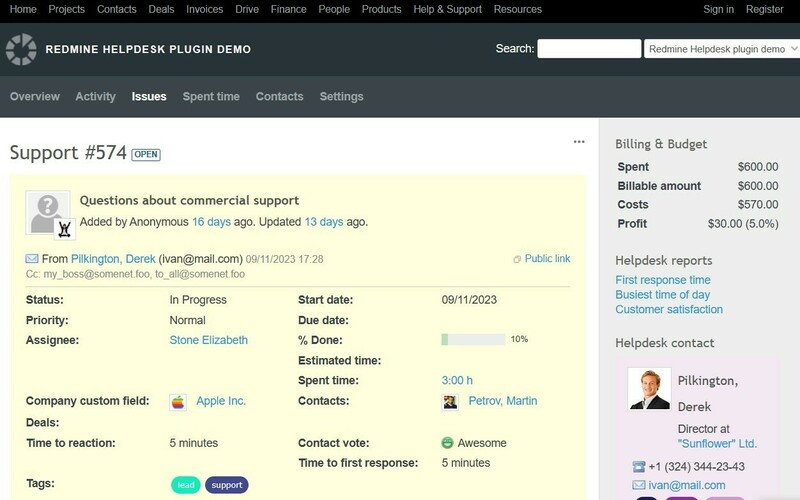
The RedmineUP Helpdesk Plugin transforms your Redmine into a powerful customer support system, eliminating the need for separate helpdesk software. This integrated solution enables support teams to efficiently manage all customer communications directly through Redmine while maintaining full context of related projects and issues.
With automatic email integration, customer messages are seamlessly converted into trackable support tickets, complete with sender details and full conversation history. The plugin enhances team productivity by providing SLA tracking to monitor response times, canned responses for frequent inquiries, and customer satisfaction surveys to measure service quality. All support activities remain connected to relevant projects and issues, giving your team complete visibility while keeping customers informed through automated notifications.
Prompt for RedmineUP expert
At RedmineUP Cloud we have an expert who can share some use cases and best practices. It will be helpful to discover Redmine 6 and find out the best way to configure Redmine for your team.
To ask a Redmine expert, drop us a message. A team of experts will check your Redmine use case and recommend the best course of action.