
In one of our posts we have already discussed two markup languages supported by Redmine. .
Now it is time to guide you through the peculiarities of the Wiki formatting to really make you a Redmine pro.
With this article, you will learn the following:
Wiki Text: Definition and Features
Wiki is a markup language used for converting texts to pre-formatted HTML. This becomes possible thanks to wiki engines (wiki software). Some of them are free and open-source whereas others cost money. Nowadays, there is no universally accepted standard for thousands of wikis in use. So, each wiki system comes with its own grammar structure and rules. Still, it allows cross-referencing (hyperlinks).
The main feature of Wiki texts, perhaps, is that their writing and publishing are managed collaboratively by online communities. Such an approach provides users with a digital open space for free discussion. Complex texts are created easily with the only requirement: a stable Internet connection. Besides, they are published in real-time. Some pages are public, so they do not need any moderator review while the private ones involve user authentication for editing and even viewing sometimes.
Migrate to secure hosting
Don't waste your time on Redmine maintenance. Hire experts and focus on your projects
Wiki Syntax: Basic Level
Let’s follow the principle “from simple to complicated” and concentrate on the syntax basics.
Since Textile and Markdown, the languages natively supported in Redmine, are of plain-text type, the new line characters in such documents are written as
</br>tags in HTML while the rest of the same paragraph follows this tag. The next paragraph comes after an empty line which equals two new line characters. For instance, the following piece of text will be treated in the program as one paragraph:

If you need to divide this simple fragment into two paragraphs, you may add
p.in Textile before the beginning of a new paragraph:
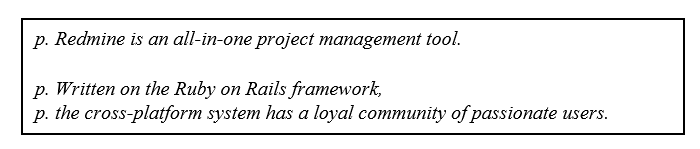
Note: maintaining an empty line is obligatory in any case.
The Textile’s tag
p.converts into the HTML
<p>tag, the same happens with the
h1., h2., h3., h4., h5. and h6.heading levels:
<h1>, <h2>, <h3>, <h4>, <h5> and <h6>in the HTML format. Markdown uses the # marker before headings, the number of hashes indicating the level of heading.
Please have a look at the following list of different markers used in HTML, Textile and Markdown:
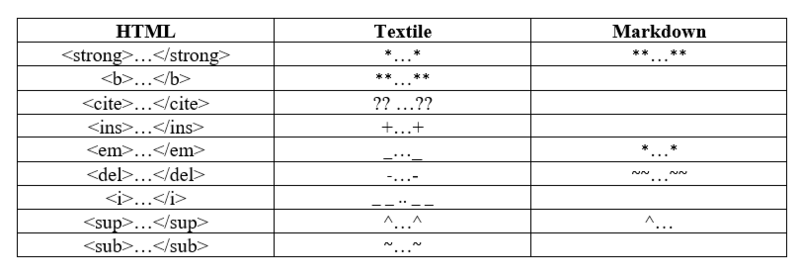
Well, if you are curious how these markers look, try to type them right now. But we are heading further.
Redmine is a great planner, so our next station is making to do lists in Wiki. The format supports bulleted (the * marker followed by a space) and numbered lists (the # marker followed by a space in Textile; a number and a dot in Markdown). If there is a need for nesting levels, users should add another marker. The level depends on the number of these markers:
# The first item
## Nested item
### Next nesting level
# The second item
1. The first item
    1. Nested item
         1. Next nesting level
2. The second item
To diversify your text, there are plenty of ways, one of which is to insert images with the ! rule. The command is the following:
!Options.ImageURL(Title)!:HREF in Textile,
where the parameters Options., (Title), and :HREF are optional. The Options parameter is used to align the image to the left (<), center (=) and right (>). The Title parameter can be helpful in case the browser is not loading, it specifies the alternative text for the image. The HREF parameter is designed to turn the image into a clickable URL link.
 in Markdown.
As everything is interconnected on the Internet, links are essential in any document. Wiki supports normal and internal links.
Generally, the strings which begin with http://, https:// or www. are automatically rendered as normal links. The same happens with email addresses. Besides, such links can be created in Textile with the following command:
"Anchor(Text)":Link,
where Anchor equals the clickable text, Link – the URL, Text – the optional link title.
For Markdown, type [Anchor](Link "Title")
As for internal links, the syntax specially developed for Redmine is the same for both markup languages. Below you may find some Redmine types of internal links:
Wiki links: [[Project:Page#NamedAnchor|Title]]
Project links: project:Name
Version links: version#ID or version:Name
Issue links: #x, where x is the issue number
News links: news#ID or news:Title
Attachments links: attachment:filename.ext
Wiki Syntax: Advanced Level
This section of our guide will be useful for the Textile lovers only. The advanced features of the markup language are supported by the majority of its syntax rules. They are habitually specified between the marker and the dot (.) which means the end of the options. Sometimes, though, the options are specified without the dot, like in formatting lists.
Compare: p(Options). … vs *(Options) ...
Now we are going to mention some Textile options beginning with the custom styles. Users may specify the name of the already existing CSS class for an element in parentheses or create the CSS rules on their own using curly brackets:
Compare: "(redmine-link)Redmine" vs "{color:red}Redmine"
Note: there is a limited number of CSS rules that can be specified in this way. It includes some properties like color, height, padding, font, text, etc.
=Another great tag supported in Textile is a span. It is aimed at styling a part of the text if other HTML tags do not work out better. For this reason, use the % marker:
Let's make %{color:red}this text red%.
Sometimes users need to start fresh and disable some elements or rules. The special ! marker is created just for such needs.
Migrate to secure hosting
Don't waste your time on Redmine maintenance. Hire experts and focus on your projects
Put Knowledge Into Practice Right Now!
You arguably have had an impression that the Wiki syntax is quite intricate. However, there is an old saying: practice makes perfect. The more you will use Wikis, the more your business will benefit. Besides, you may try RedmineUP and get professional feedback at any time to make a smooth start.
