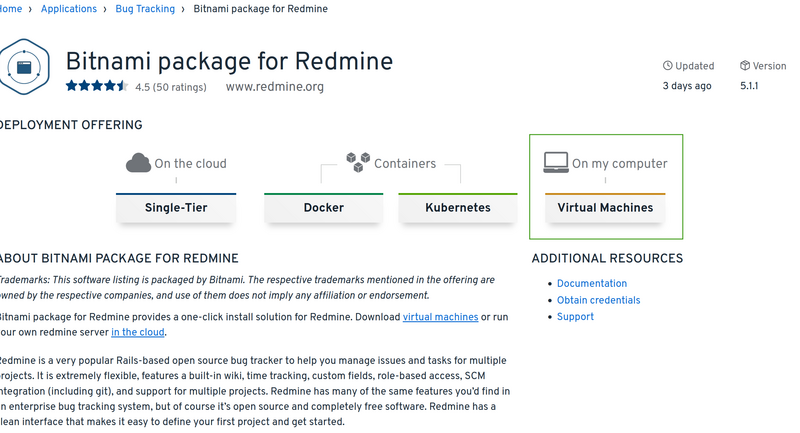
Recently Bitnami decided to move Redmine entirely on a virtual image in .OVA format. The following guide will teach you how to install this image via the VirtualBox.
Firstly, you have to download the latest Bitnami Redmine image from their site in section On computer / Virtual Machines.
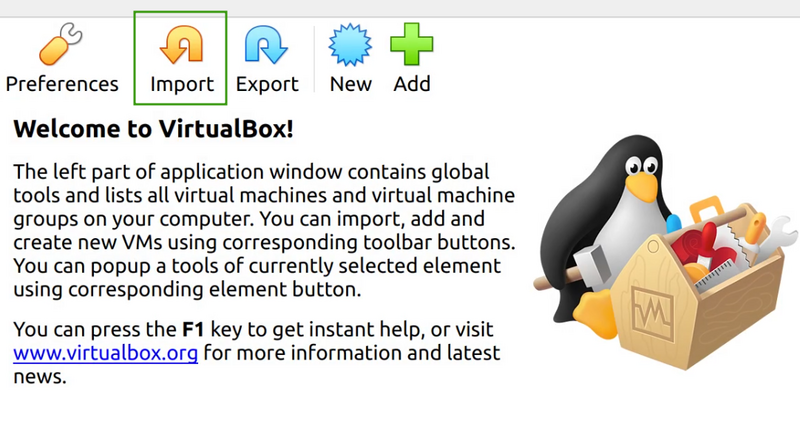
In the current example we are going to use VirtualBox for mounting but you can use VmWare or any other similar tool that you wish.
So, once you open the VirtualBox, click on the Import button.
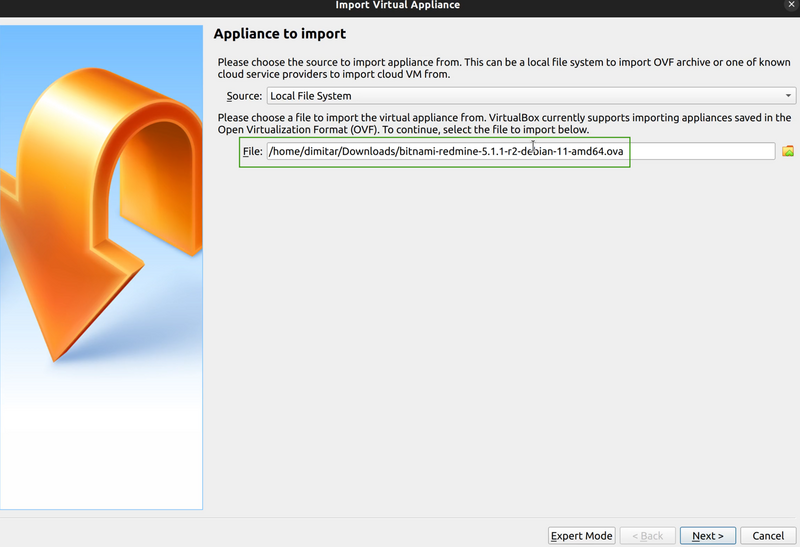
Now select the file from the directory where you downloaded it.
The next window will show you some predefined parameters of the virtual machine like CPU, RAM, storage, USB, etc. Please note that you can change them anytime afterward.
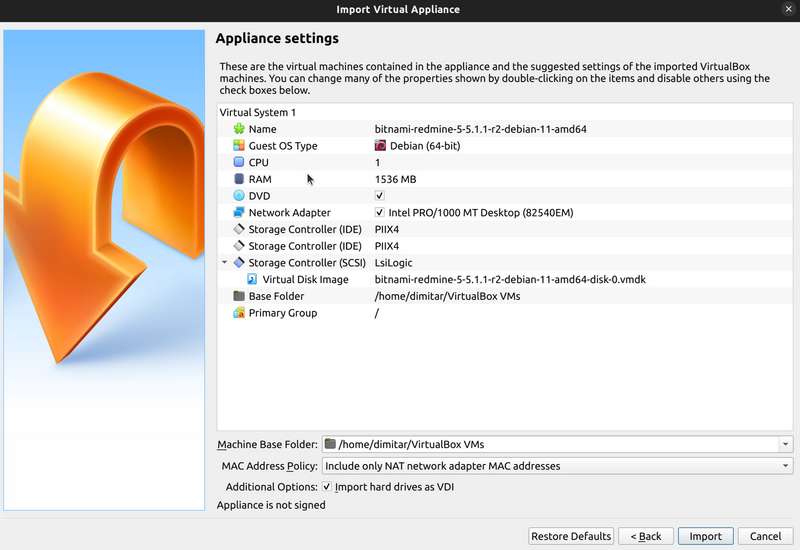
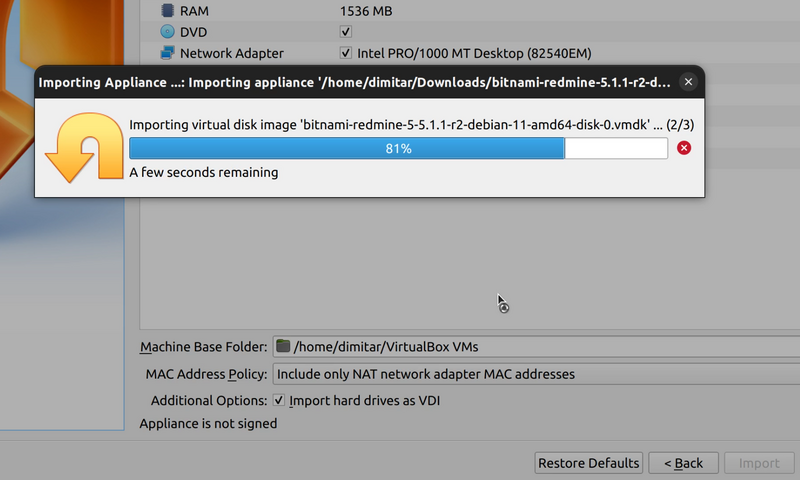
Afterward, you click on Import button and just wait for the process to finish.
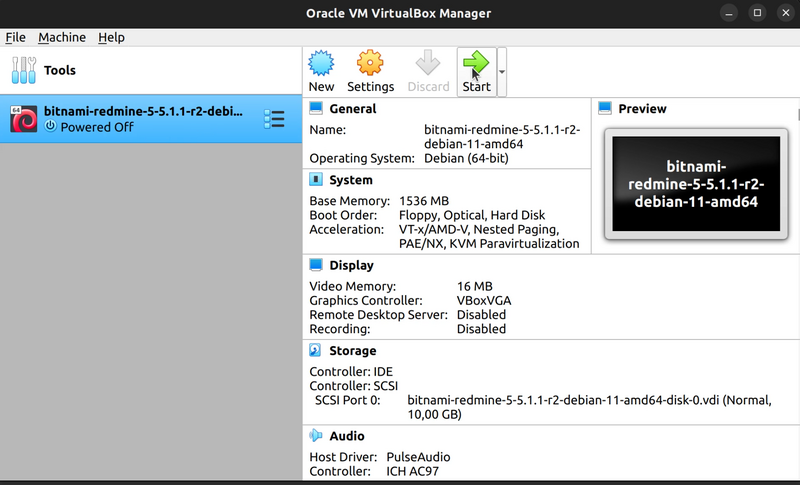
Our Redmine is now ready. Just click on the Start button to power on the virtual machine with the Redmine.
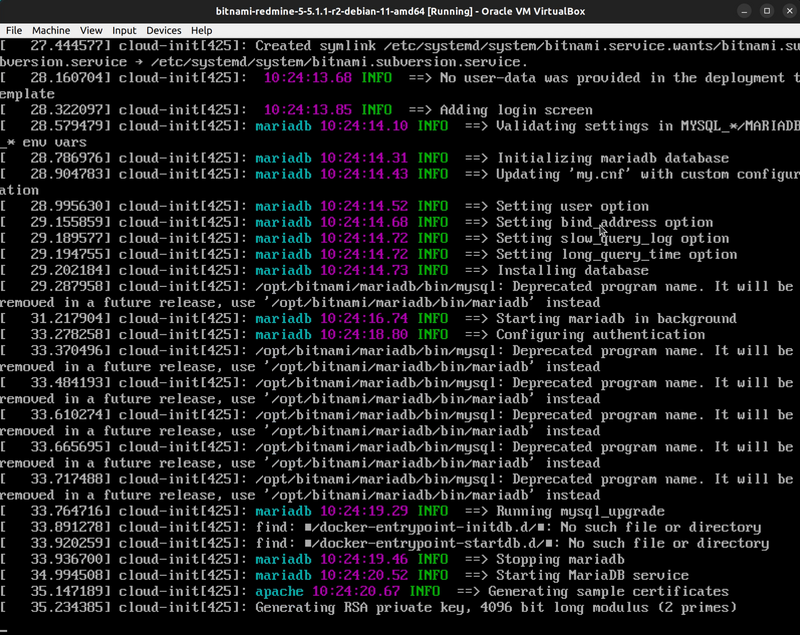
During this first start all the configurations will be done automatically - database creating and migration and all other kind of services setup.
Note: Please keep in mind that these configurations are done only on the first start and could take some time to finish the processes. The next starts of Redmine will be faster because all the settings will be already predefined and just ready to run.
Once the configs are done, then your Bitnami Redmine will start instantly as a command line. You will get a message with your default:
- IP address where the Redmine could be accessed
- Username and password to log into Redmine front-end
- Username and password for the command line Redmine back-end
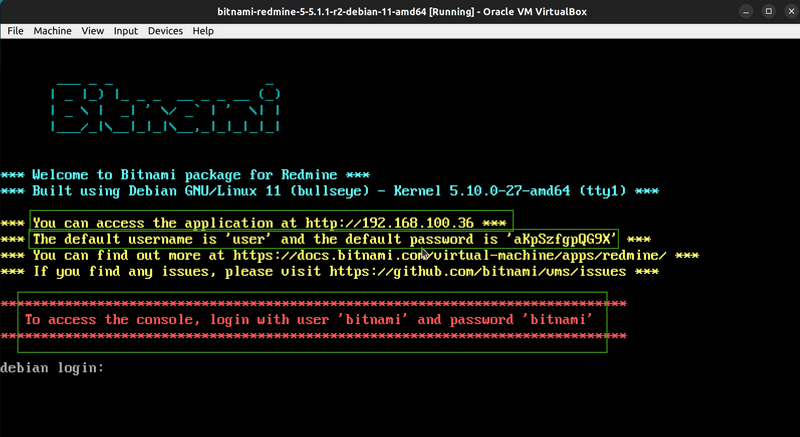
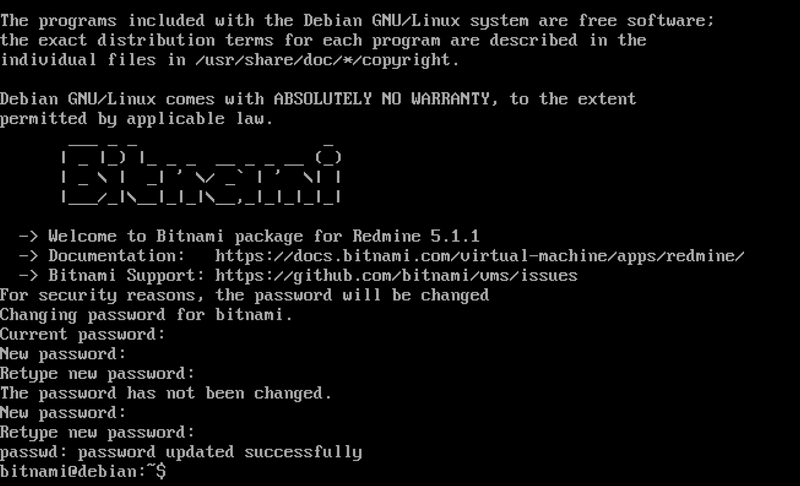
Afterward, it will ask you to change the password for the command line for security reasons. You will not be allowed to keep the default password, so please insert a new one.
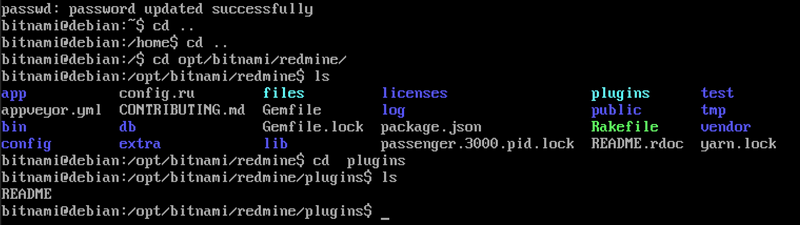
The Redmine folder is located in opt/bitnami/redmine directory. The plugins folder is empty because it is a freshly installed new Redmine.
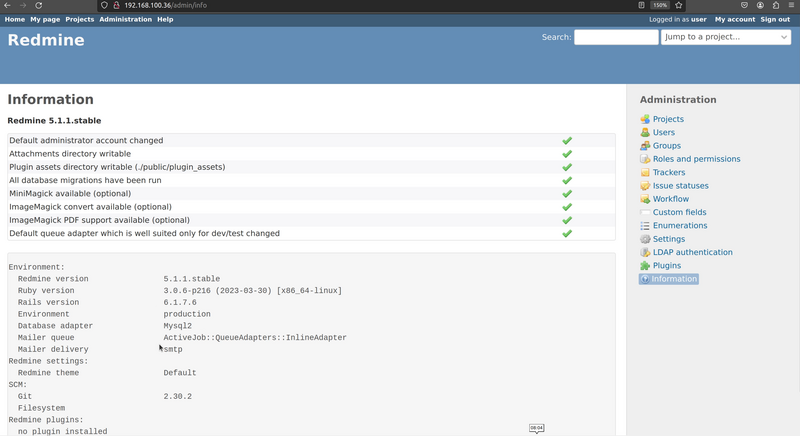
Okay, now we are ready to access the IP address of the Redmine. It is up and running successfully.
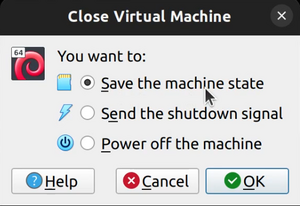
When you are done with your Redmine tasks and work, you can then switch off (via the X button like closing any other program) the virtual machine either as it is a real machine, i.e. to power it off or you can close it with an option to start again afterward from the same point where it was switched off (like it is just paused).