
Today we share brief instructions how to create an invoice based on time entries or selected issues. .
One of the most useful and fastest ways of billing your client is preparing detailed list of tasks, assignment or tickets you have worked on for them. You create one invoice based on the list that contains information how much time your employees or contractors worked on the particular project. You can save a lot of precious time and nerves and do this in just a few clicks with functionalities given you by Invoices plugin. It allows you to set up invoices that display the range of activities for the client in a few different ways.
You can create an invoice based on a type of activity reported, logged issue list, issues reported grouped by users, a list of time entries, or just include all entries in one line.
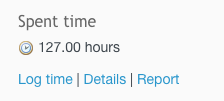
To create an invoice, simply go to the Overview tab on the left side of the project tabs menu, then in the right column on the top, click on the "Details" under the logged time.
In the next step, select entries you want to include in the billing by selecting the checkboxes on the left side, or by choosing issues with pressed "Shift" key and clicking on them. To select all of them entries that are visible on the screen, click on the top left checkbox.
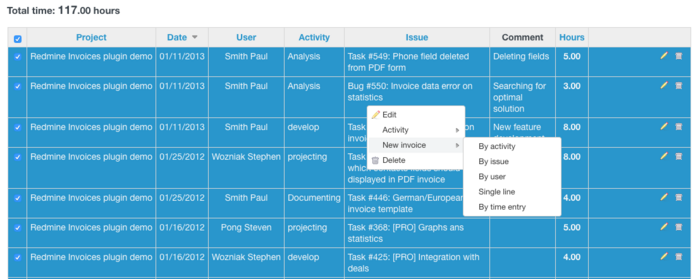
Now, with a right click on the list, you will open a simple menu with the desired option "New Invoice" and possible ways of creation.
I will briefly show you the effects of each of them.
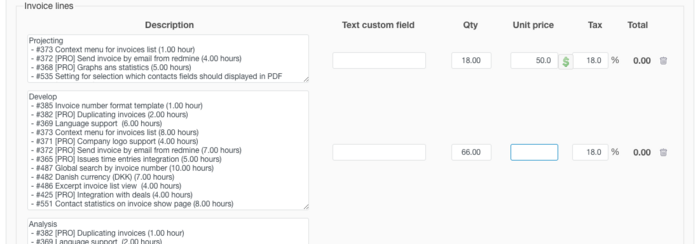
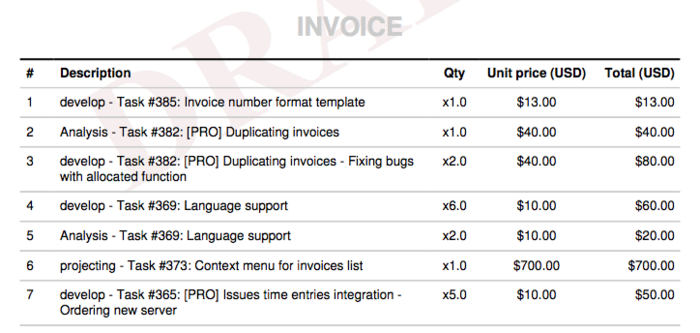
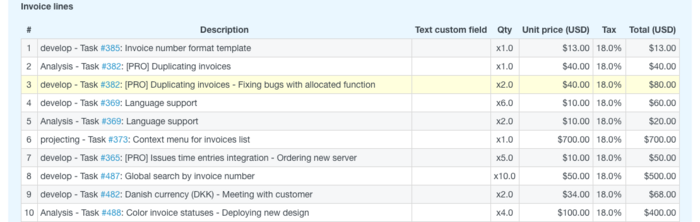
The first option will list entries "by activity", so by the types of activity (in our example Analysis, projecting, developing, documentation) and list down all issues assigned to each category, summing altogether recorded time.

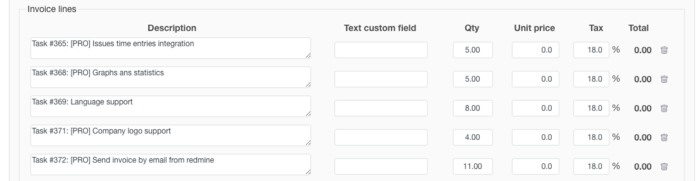
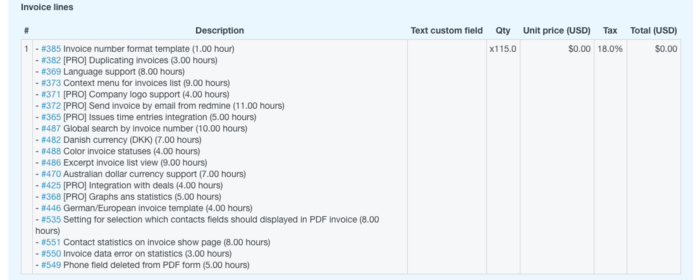
The second option list down all selected issues in separate lines. You might notice the link to the issue. If you click on the issue/ticket/assignment ID, the system will show you its details. Yet, the link will not be visible on the final invoice.
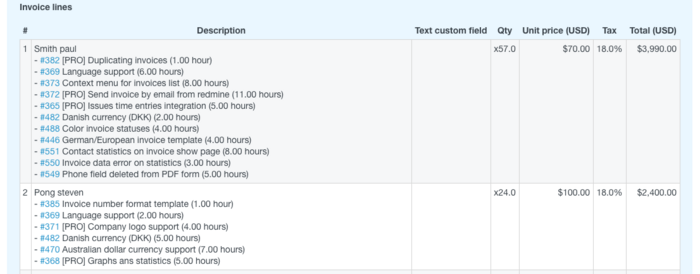
 Editing view.
 Draft view.
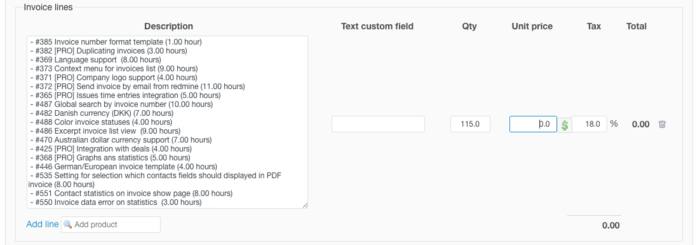
 Final view.
Next option 'By user" works similarly to the first one. The difference is that now the grouping goes by the user assigned to the issues.
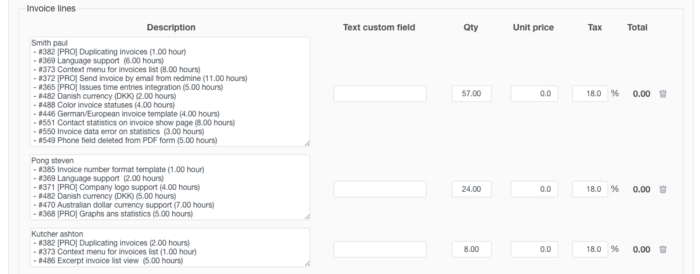
The fourth option takes all selected time entries, puts them in the one line with the sum of hours billed.
The last position on the lists adds all single time entries logged in the Redmine. It includes attaches recorded time entries with issue name, ID and a comment (if the entry was commented upon).
Please note that every time you give your rate for each entry.
In next step, you need to finish filling out details of the invoice, and it is ready to be sent to a client. If you set it up based on repetitive tasks, you can make it a recurring invoice. We shared instruction how to create a recurring invoice in the last Tip Tuesday post.
See you next week. As always, we are waiting to write posts that would make your work faster, easier and more efficient, so send your ideas and requests to us or leave them in the comments below.
