In first Top Tuesday for June, I will briefly show you how to use checklists templates and save much time on creating repetitive tasks. .
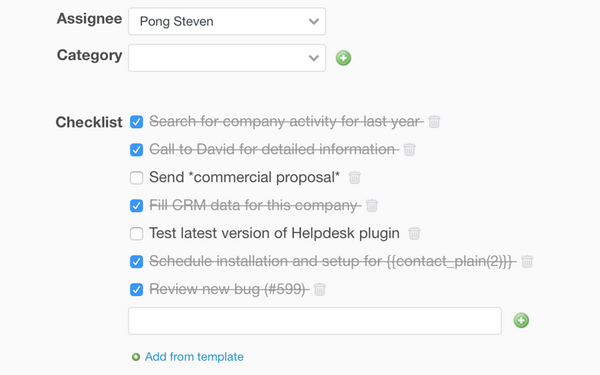
Many tasks we do every day creates a plenty of space for automation, no matter in which industry, area or department you work in. Coming down to specifics, if you have one task that contains sub-tasks, instead of creating separate issues in Redmine you can include them into checklists. Once a certain job is finished, you can mark it as 'Done' with a click of a mouse. The best part is that you can create reusable lists of tasks and save a lot of your - and your teams' time. You do not have to worry about creating a broad list if templates because you can categorize them what makes finding appropriate one faster and easier. So let's take a closer look how to handle all of this.
To create a checklists template go to Settings of a selected project. Then find a "Checklists" tab.
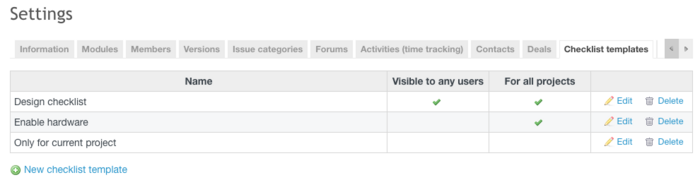
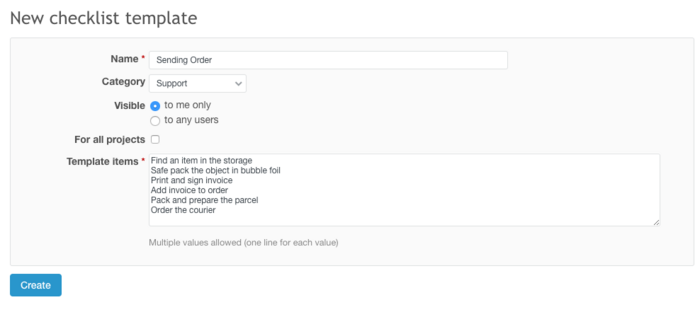
Here you can see all of the templates and an option to add a new one. Once clicked, on a window to create a new one you will see an option to add it to a particular category (there have to be created separately). You can select whether the template will be visible only to you, or other users as well, and as you can see you can decide whether it will be visible to the current project or the all. To add tasks just type each in a separate line.
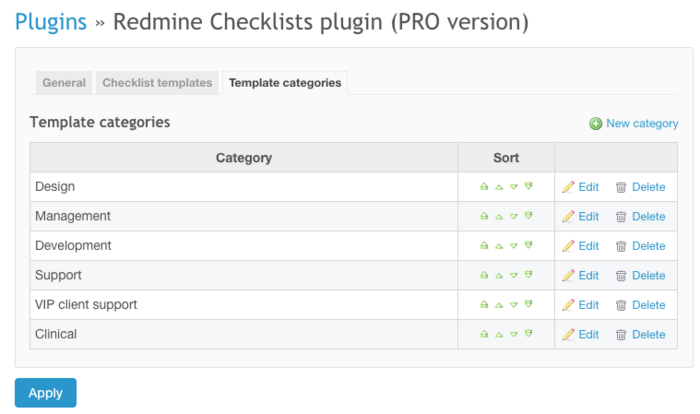
To add new template category, go to Administration and Plugin settings. Here among the list of current categories, you can add a new one.
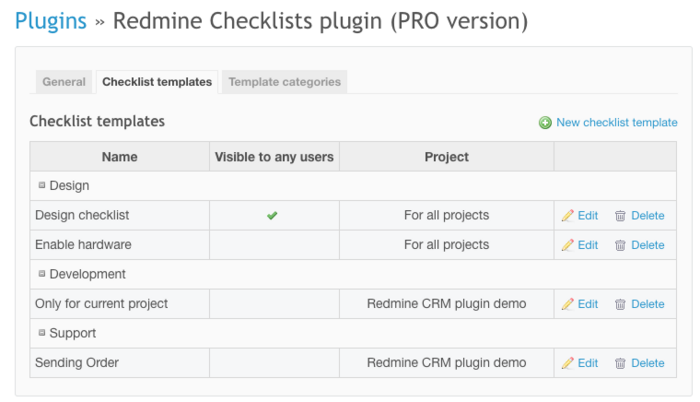
I another tab you can also see all templates and categories that they belong to.
That is all for today. We look forward to seeing your comments and feedback.