After version 4.2.0 of the Helpdesk plugin a new feature was added - OAuth authentication for MS Office 365. In this guide, we will teach you how to configure the plugin on this point.
- Creating OAuth App
- Set up the Helpdesk plugin for incoming mail
- Automation of receiving emails
- Outgoing mail settings
- Shared Mailboxes
- Troubleshooting
- Video demonstration
Creating OAuth App
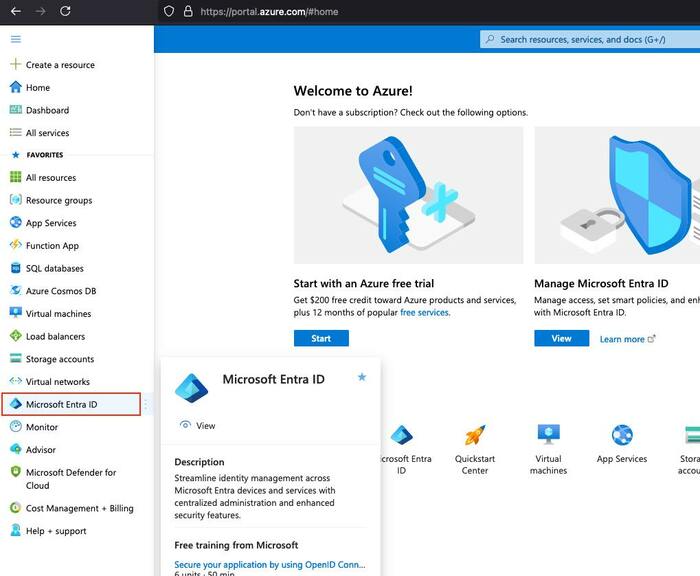
Please login to the site of Microsoft Azure. Then select Microsoft Entra ID.
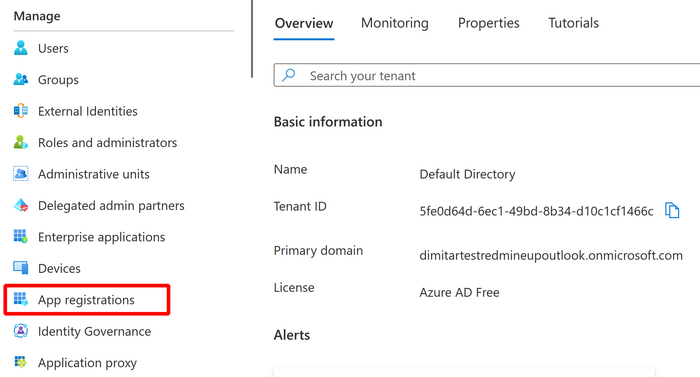
Then on the left sidebar, please click on Manage, a drop-down menu will appear, then click on App registrations.
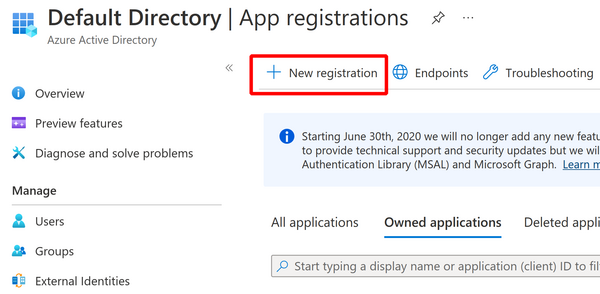
Afterward, just select New registration.
Now, fill in the below 4 fields:
- Name
- Supported Account Type
- Redirect URI (URL) - type "Web"
- Redirect URI (URL)
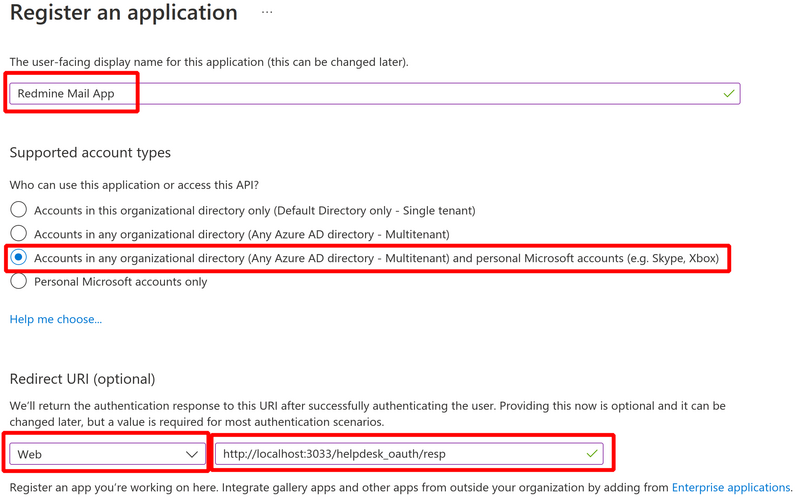
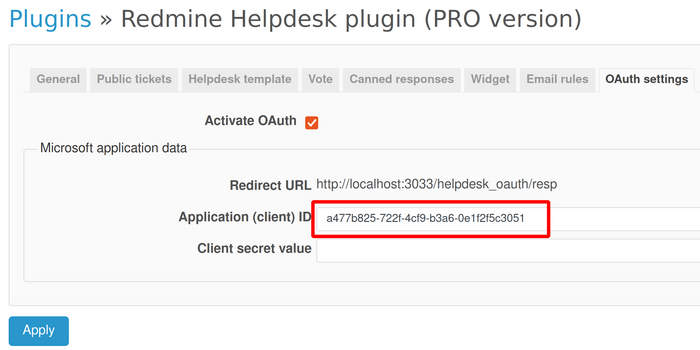
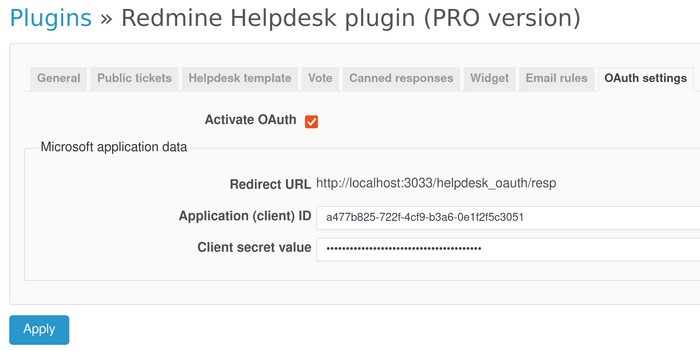
The Redirect URI (URL) is taken from Administration - Plugins - Helpdesk - Configuration - OAuth settings tab.

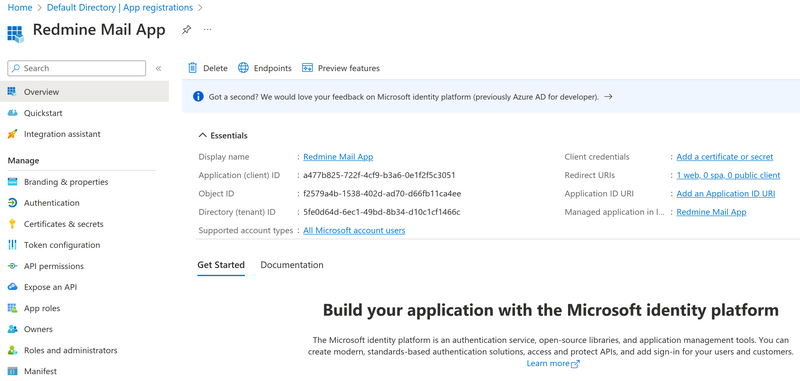
The ready app (after saving) looks like this.
Now, copy the Application (client) ID via the button.
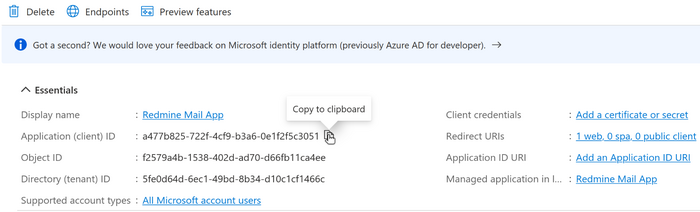
Please paste it into the Helpdesk configuration field.
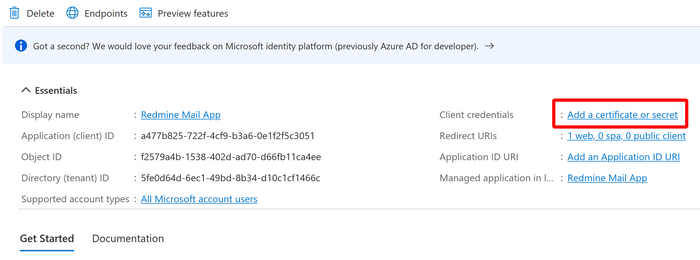
The next step that we have to do is to create our secret value. It is going to happen via the Add a certificate or secret button.
Click on the New Client Secret.
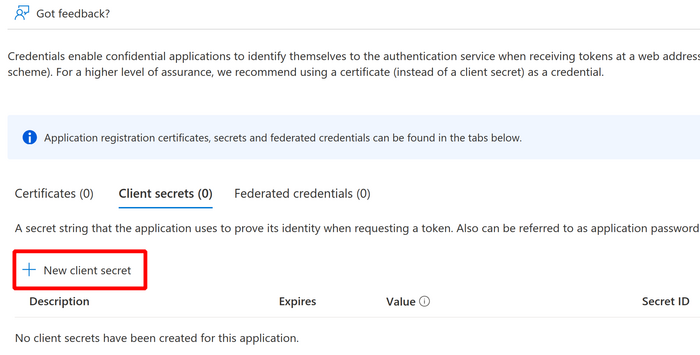
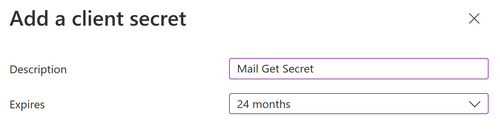
- Description
- Expires
Now, please copy the Value via the button for copying.
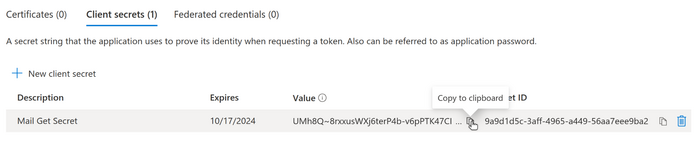
And paste it into the Client secret value field of the Helpdesk settings.
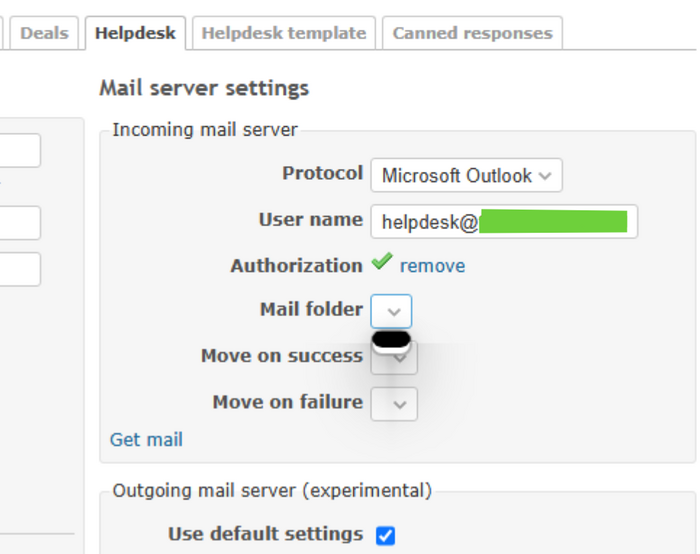
Set up the Helpdesk plugin for incoming mail
We have almost done our job. Now, we need to set up the Helpdesk itself. Please go to the Helpdesk project you would like to configure and go to the settings tab and fill in the below 3 fields for the incoming mail settings:
- Protocol - Microsoft Outlook
- Username
- Password
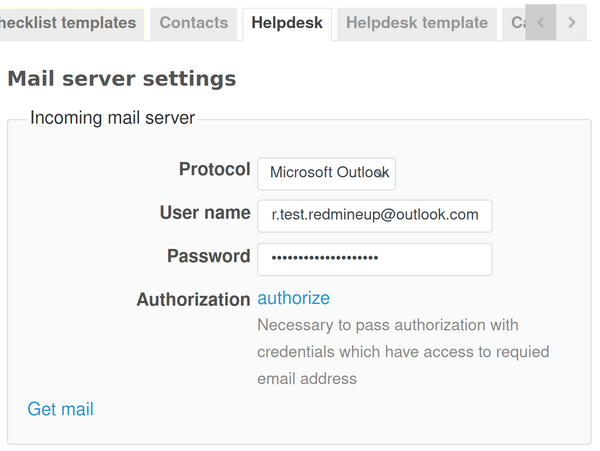
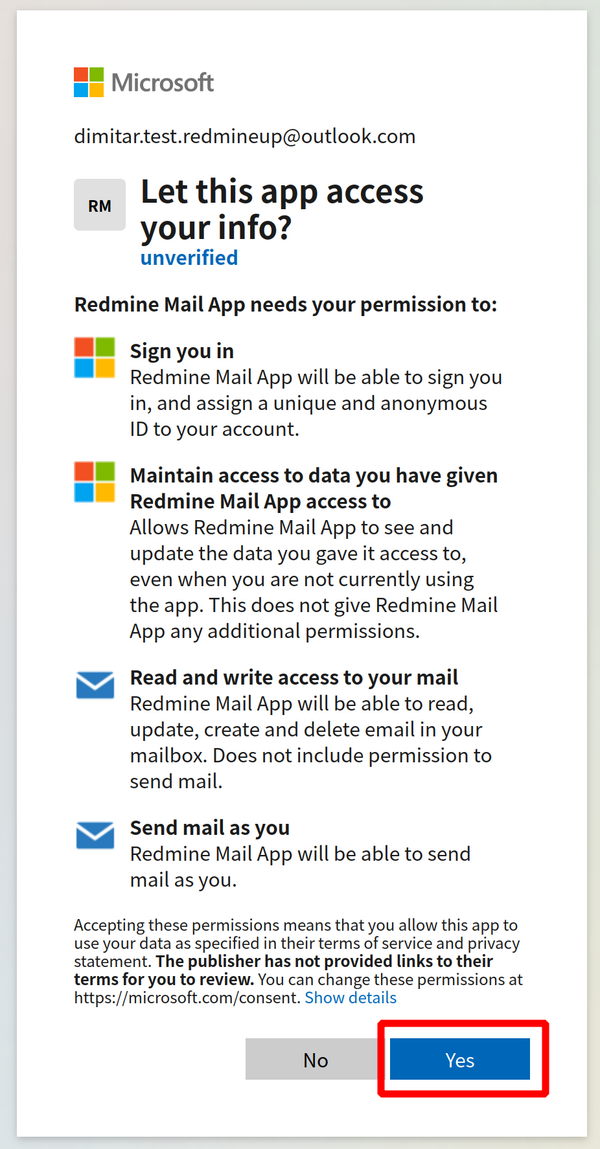
Then click on the Authorize button that is located below the Password button. You will be redirected again to the Microsoft site to log in again. Afterward, a new window will come to you Let this app access your info?. Please click Yes.
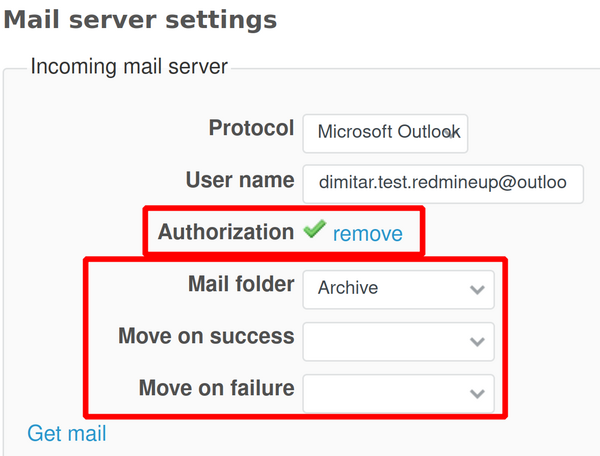
- Mail folder
- Move on success
- Move on failure
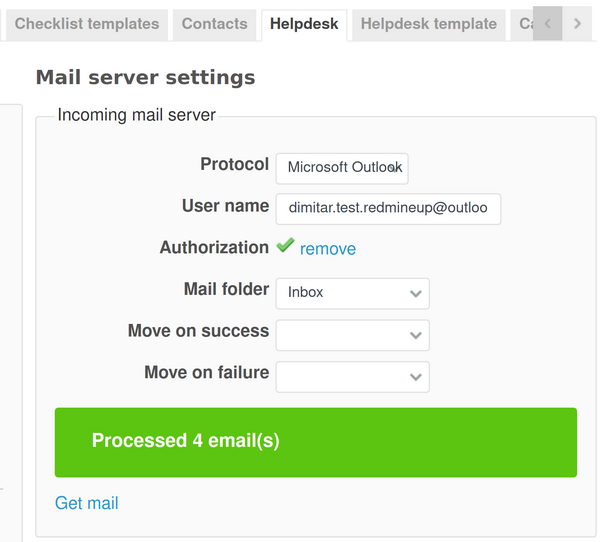
Important: If you have some problems with the authentication for example throwing an error, empty fields (drop-down fields, etc.) and so on, then please scroll down to the Troubleshooting paragraph couple of lines down the page to find the solutions.
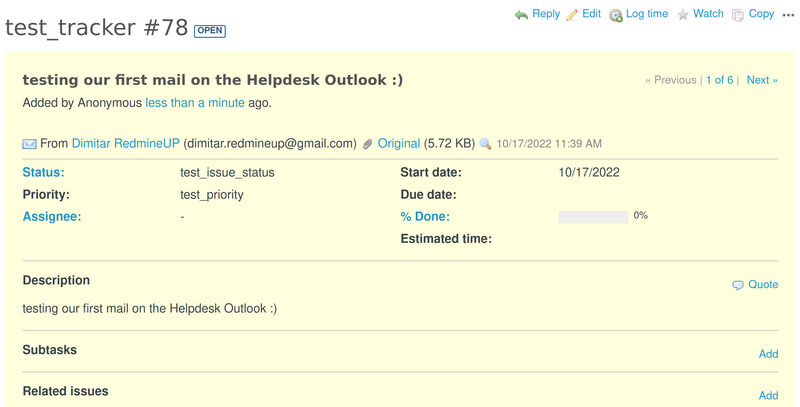
And now we test our configuration and see that everything is fine. The emails are received.
And our first received mail.
Automation of receiving emails
When you successfully set up the OAuth for your project then you could configure the receiving of the emails to be automatic. It could be done in 2 ways:
bundle exec rake redmine:email:helpdesk:receive RAILS_ENV=production
Or:
wget -O - http://127.0.0.1/helpdesk_mailer/get_mail?key=******************
More detailed information about the automatic receiving configurations could be checked in this article.
Important: The IMAP method isn't available for OAuth.
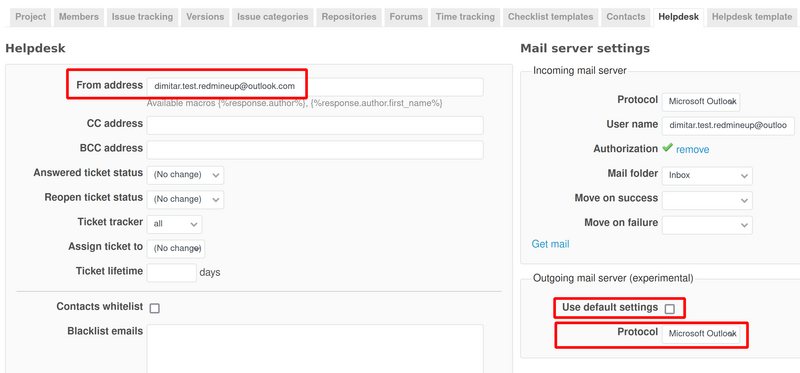
Outgoing mail settings
When you successfully authorize Outlook, you will also unlock the Microsoft protocol for the outgoing settings as well. So, you have to:- Disable the default settings
- Select the Microsoft Outlook protocol from the drop-down menu
- Set your outlook email address to the From field
Please check the below picture to make the situation more clear.
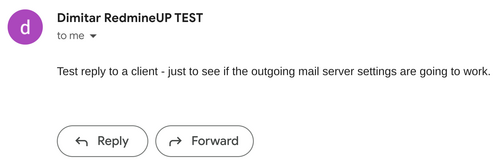
So, when we sent a reply to a client via the Helpdesk ticket interface.

He will successfully receive it.
Shared Mailboxes
To use shared folder you need to specify folder address in "Username" field and thereafter pass authenticate with user who have access to this folder.
Troubleshooting
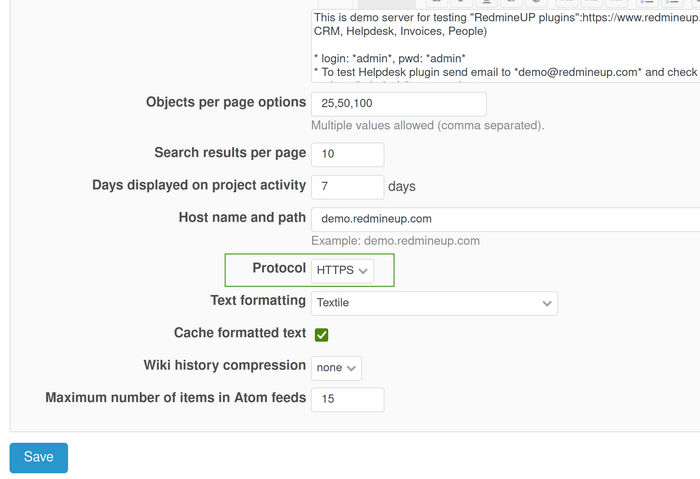
- Please change the settings for Redmine to HTTPS protocol (in administration - settings general) if you use the OAuth feature or some sort of LDAP. Otherwise, the plugin will fail to load on the desired site.
- If you have this error:
[2024-10-18T10:11:53.588980 #3710] FATAL -- : [7c045f25-b2ee-46a9-ab1d-6b5a21841d22]
[7c045f25-b2ee-46a9-ab1d-6b5a21841d22] SystemStackError (stack level too deep):
[7c045f25-b2ee-46a9-ab1d-6b5a21841d22]
[7c045f25-b2ee-46a9-ab1d-6b5a21841d22] plugins/redmine_contacts_helpdesk/app/models/helpdesk_oauth_provider.rb:81:in `block in execute'
The issue was due to the OAuth certificate on Azure that had expired. You have to fix it by renewing the certificate.
- In case you have an empty drop-down menu fields similar like the picture below:
Cause of the problem: When you update your expired Oauth secret and you are logged into Azure as another user to create the new secret. When clicking the Authenticate button in Redmine, it automatically uses the Azure account you are logged in to and didn’t prompt for the user used by Redmine. This means the Redmine email address didn’t exist for the authorized user. There is no prompt to indicate this mismatch.
Then, please execute the below steps to fix the problem:
1. Remove the authentication.
2. Ensure you are not logged into Azure or Outlook.
3. Authenticate in Redmine.
4. This time you will be prompted to approve the Oauth user and prompted to login.
5. Login with the Redmine email address.
Afterward, everything will be fine.
- "Sign in" button not working
Description of the problem: After clicking on "authorize" option Microsoft authentication window is showed and correct credentials have been entered. After clicking on Sing in button nothing happens.
Solution: The problem is caused by using different Microsoft Office 365 accounts from different Microsoft Tenants on the same Redmine platform.
Steps for solving the problem:
1. In the Rails console, please remove old/broken OAuth tokens and set the correct tenant ID.
2. Restart Redmine service.
3. Perform OAuth Authorization again.