- Set Outgoing Mail default settings
- Apply individual Outgoing mail settings for a specific project
- Reply to customer's tickets
Helpdesk plugin converts incoming messages to tickets. By answering, you generate an email reply to the sender. You can use this option in projects that have Helpdesk enabled.
Set Outgoing Mail default settings
Before starting work with emails in Redmine or Helpdesk, you have to set your default Outgoing mail settings.
Find configuration.yml file. Go to your Redmine folder and navigate to the file path:
...\apps\redmine\htdocs\config\configuration.yml
The configuration file itself may include examples of outgoing mail settings for different cases. Choose the proper one to use (if available).
Below are given some examples.
Simple Login Authentication (default settings)
# Outgoing email settings

production:
  email_delivery:
    delivery_method: :smtp
    smtp_settings:
      address: smtp.example.net
      port: 25
      domain: example.net
      authentication: :login
      user_name: redmine@example.net
      password: redmine

development:
  email_delivery:
    delivery_method: :smtp
    smtp_settings:
      address: 127.0.0.1
      port: 25
      domain: example.net
      authentication: :login
      user_name: redmine@example.net
      password: redmine
Office 365, Exchange Online
In this case, the sender must have an account. Otherwise, if you want to send from a shared mailbox, the account below must have the authorization to "Send As" the sender defined in Redmine Email notifications settings .
production:
  email_delivery:
    delivery_method: :smtp
    smtp_settings:
      enable_starttls_auto: true
      address: "smtp.office365.com"
      port: 587
      domain: "your_domain.com"
      authentication: :login
      user_name: "email@your_domain.com"
      password: "password"
Gmail; Google Apps - G Suite
In case you want to use Gmail/Google Apps and other TLS-requiring SMTP servers, you'll have to add some TLS-related settings.
production:
  email_delivery:
    delivery_method: :smtp
    smtp_settings:
      enable_starttls_auto: true
      address: "smtp.gmail.com"
      port: 587
      domain: "smtp.gmail.com"
      authentication: :plain
      user_name: "your_email@gmail.com"
      password: "your_password"
If you will send emails from G Suite (formerly Google Apps), we suggest that you use SMTP relay with its larger sending limits. (More information and detailed guide on how to enable SMTP relay are here ).
When configuring SMTP relay service, use something like this:
- Name: Redmine
- 1. Allowed senders:
Only registered Apps users in my domains - in case you have created a G Suite user dedicated to Redmine
- 2. Authentication
[x] Only accept mail from the specified IP addresses - IP address of your Redmine server
[x] Require SMTP Authentication
- 3. Encryption
[x] Require TLS encryption
Config could be really simple:
production:
  email_delivery:
    delivery_method: :smtp
    smtp_settings:
      address: smtp-relay.gmail.com
      port: 587
      domain: smtp-relay.gmail.com
      authentication: :plain
      user_name: your_email@gmail.com
      password: your_password
Sendmail command
This example is for a Unix system that uses the /usr/sbin/sendmail command.
production:
  email_delivery:
    delivery_method: :sendmail
No Authorization
For an SMTP service provider with no authentication.
production:
  email_delivery:
    delivery_method: :smtp
    smtp_settings:
      address: smtp.knology.net
      port: 25
      domain: cybersprocket.com
Apply individual Outgoing mail settings for a specific project
Projects with enabled Helpdesk can use default Outgoing mail settings or modified ones. Go to project's Settings page, tab Helpdesk:
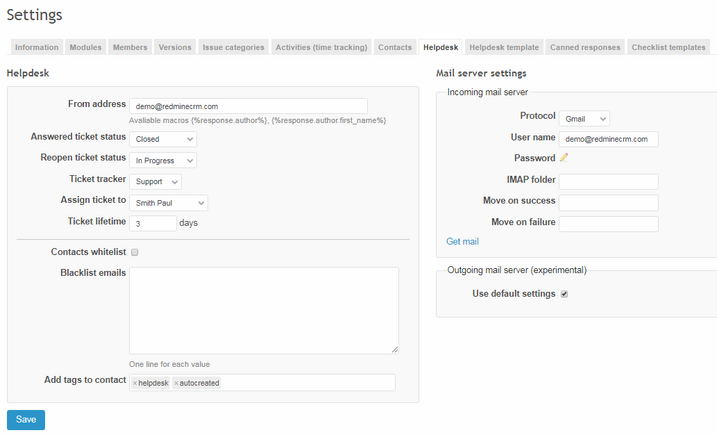
If you uncheck "Use default settings" for the Outgoing mail server, you will be able to set the following values:
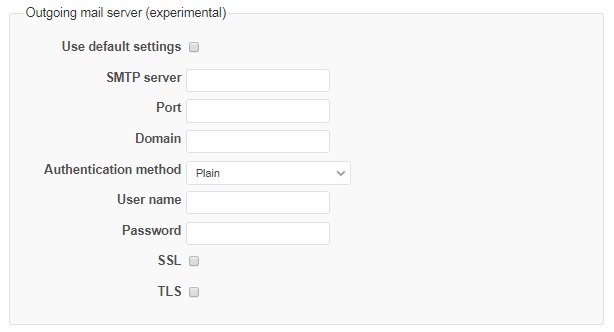
Authentication method can be set to Plain, Login or MD5 Challenge-Response; both SSL and TLS can be enabled.
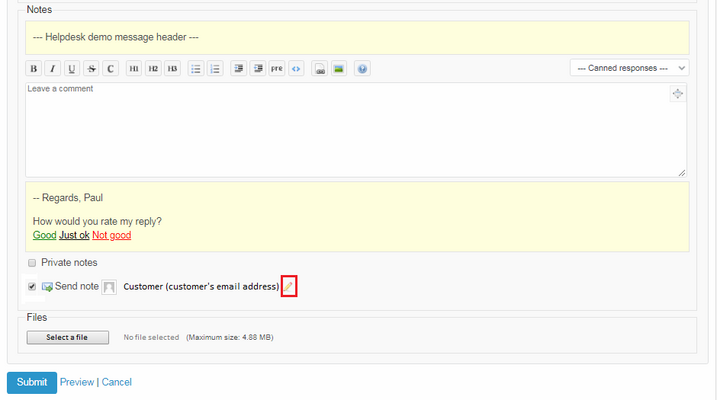
Reply to customer's tickets
When a customer's message is converted to a ticket, by adding a reply you can generate an email to the specified email address given or used by the customer. Your message will use settings applied for Helpdesk template ad you can include Canned responses (created and saved in the corresponding tab of Project Settings).
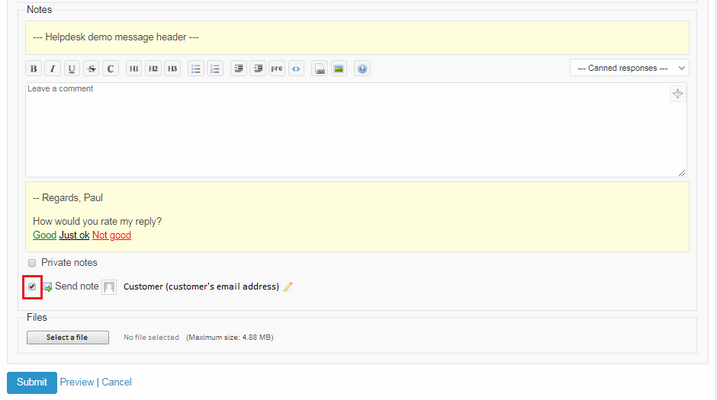
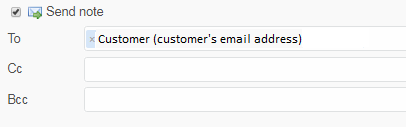
To generate an email message to the customer by replying to his ticket, "Send note" has to be checked.
If you need to change the email recipient, use this icon:
Then you can add or change email recipients (Click on "x" to remove the main receiver's email).