So, you have just signed up for a 15-day Free Trial of RedmineUP Cloud (if not Register for a Free RedmineUP Cloud Trial here). During this period you can set up all settings and simulate your customer support process. Let's learn how to build a full-featured Helpdesk system and automate it in a few easy steps.
Steps Checklist:
- 1. Project settings
- 2. E-mail settings
- 3. Support managers
- 4. Tickets workflow
- 5. Templates & Autoreply
- 6. Contact information
1. Project settings
Once you have registered for the SaaS trial, please access your account. Open or create a project for managing requests from your customers. Please be sure that CRM and Helpdesk modules are enabled in this project.
Author's Tip: We recommend that you use the Agile module, too, in order to manage the process. As a manager, you can set up a Kanban board and see what is going on with tickets at any time.
2. E-mail settings
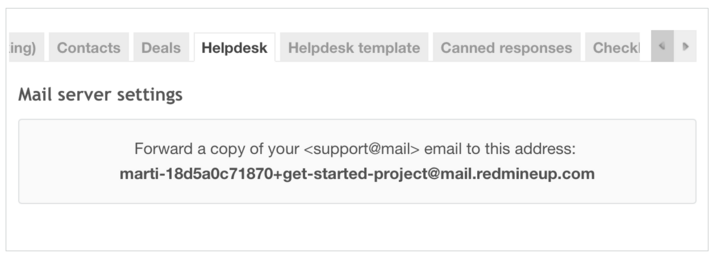
All email messages from your customers can be converted to tickets (issues with tracker: Support). To set up email settings, go to your project Settings - Helpdesk and put your support email in the field From address.

On the right side of this page, you can see the field Forward a copy of your email to this address: where you will find your unique address. All messages that come to that address convert to tickets in helpdesk (issues with tracker “Support”).
Author's Tip: Open your email app, and send a test message to your unique address. A new ticket will appear in the Issues list in 10 minutes. You will be notified about the ticket along with a link.
If you want to set up your existing email, copy that unique address, and set up redirection on your support email. In some cases, you need to confirm redirection. Then you will get all your messages to your helpdesk system.
By default, Helpdesk can catch messages with a 10-minute interval, and you can set up other general settings:
- Answered ticket status
- Reopen ticket status
- Ticket tracker
- Assign ticket to
3. Support managers
To add a new user (support manager), you need to go to Administration - Users - Create new user. Then you can add that user to your support project with a certain role and permissions.
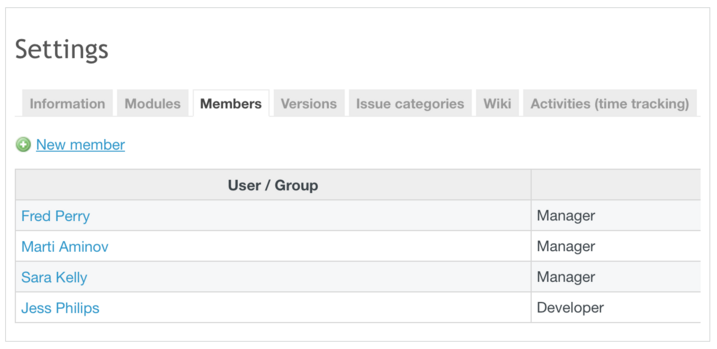
You can create a new role or use what exists for managing permissions concerning helpdesk. Be sure that your support agents (Redmine users) have the following permissions:

Author's Tip: Choose the one agent (first line support) who will be notified after a new ticket arrives. Use *Private notes* to send a message to your colleagues. All replies will be kept on the ticket history.
4. Tickets workflow
By default, all your messages will be converted to tickets with status New. The assigned support manager will be notified by email about a new ticket. He can resolve it or delegate it to a colleague using private message. In that case, you can use status In progress. That colleague will also be notified by email.
After you answer a ticket, the status will be automatically swiched to *Resolved*. If you receive an answer from your client, the ticket status will be Non answered.
Use the Autoclose tickets after option to avoid everyday routine. Don't forget to ask your customers for a Satisfaction Vote which allows you to know whether or not your customers are fully satisfied with your support service as well as what they like or dislike and why. This information makes your helpdesk service even more flexible and efficient.

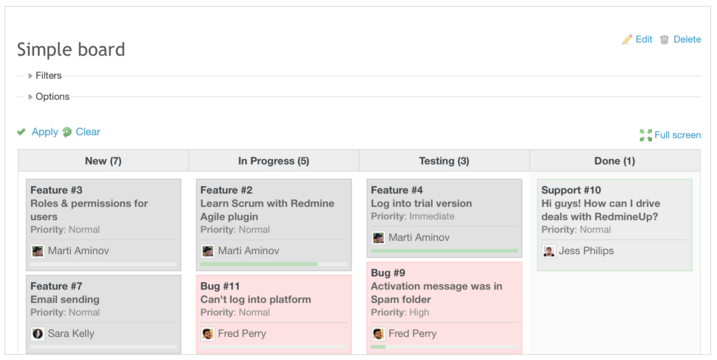
As a manager, you can check your tickets by using an Agile board, which allows further visualisation of the current situation with tickets. See what is going on right now. You can set up your own board and see all tickets per agent or all tickets per SLA (high priority) or all your tickets and so on. Use Filters and Options to filter it.
5. Templates & Autoreply
Every message you send to your customer will have all necessary information. Plus, you don’t need to always add such basic phrases as “Hi, my name is Marti.”
Due to macros, you can add a ticket link to a customer portal or customer satisfaction rate. Don’t forget to use a signature.
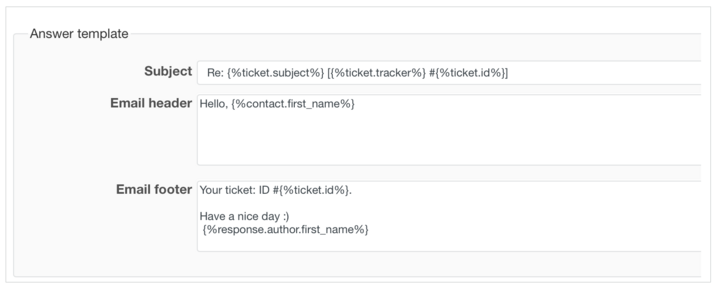
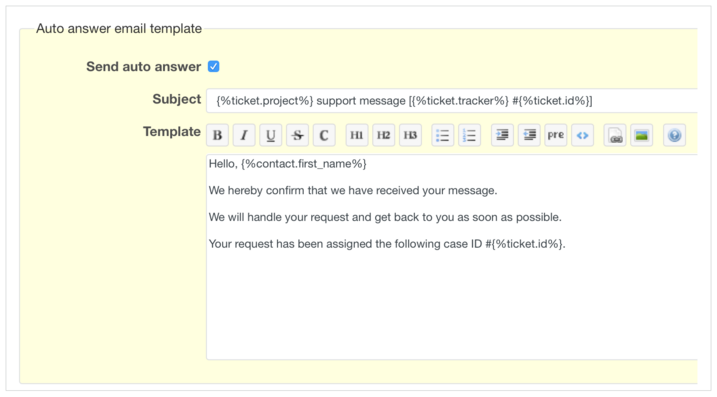
Auto-answer email is email that will be automatically sent to a customer when his first message is received and added to Redmine. This is a default (for all projects) template, but it can be replaced with the Answer template from a specific project.
To prepare or edit a helpdesk auto-answer email template, go to Administration - Helpdesk and choose the Helpdesk template tab. You can modify its content by using macros. To enable Auto responce, go to your Project Settings - Helpdesk Template tab.
6. Contact information
If you receive a new ticket from an unkown person (unique email), helpdesk will automatically create a new contact. On the contact page, you can see all previous tickets. Use it for personal facts to show that you really care.
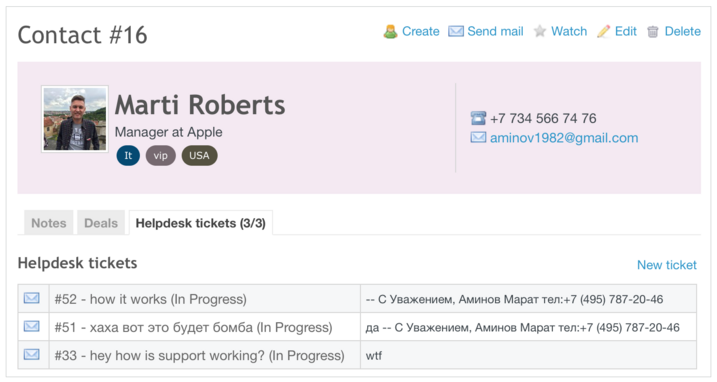
Use tags to segment your contacts. This allows you to catch necessary facts to show your real concern. A personal touch is very important to build a strong relationship with your customers.

Good luck with settings! Anyway, please let us know by commenting if we missed something for your start!
Help Documentation, FAQ and Troubleshooting
Create a free trial account in the Cloud (15-day Free!)